 |
Shielding Cable 1:
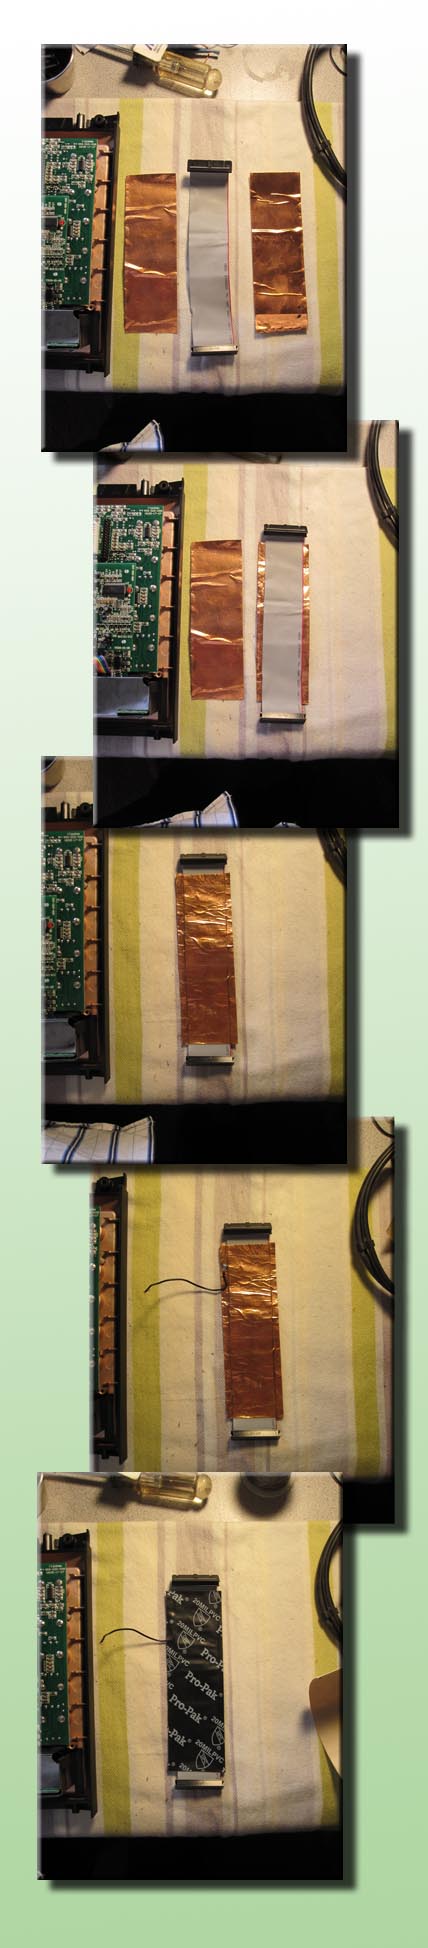
As I was probing around in the amp, this grey ribbon cable appeared to be the one most sensitive to noise pickup. Even getting my hand close to it would cause a significant increase in the buzzing produced by the speakers. The cable can be found connecting the input panel board on the front of the amp to the panel on the rear.
Start by unplugging the cable but make note of the orientation so you can plug it in correctly after shielding it. Next, cover the front and rear of the cable with a strip of the copper tape. It's not necessary to put the copper all the up to the connectors, leave a quarter inch or so on each end so the cable will stay flexible.
Next you'll want to solder a 3 inch piece of wire to the end of the cable that plugs into the front panel. Solder the wire to the edge of the copper tape making sure not to over heat the copper and melt the insulation on the cable.
Finally, cover the front and back of the shielded cable with insulating tape. I used pipe tape, but any type of non conducting tape should work fine. Make sure to leave the loose end of the wire free, this will need to be soldered to ground on the input board a little later.
|
|
Shielding Cable 2:
I'm not sure this cable needs to be shielded, but since I was in there I decided to go ahead and cover it with copper tape. Follow the same procedure as the first cable. I just left it plugged into the front panel board while I worked.
|
 |
 |
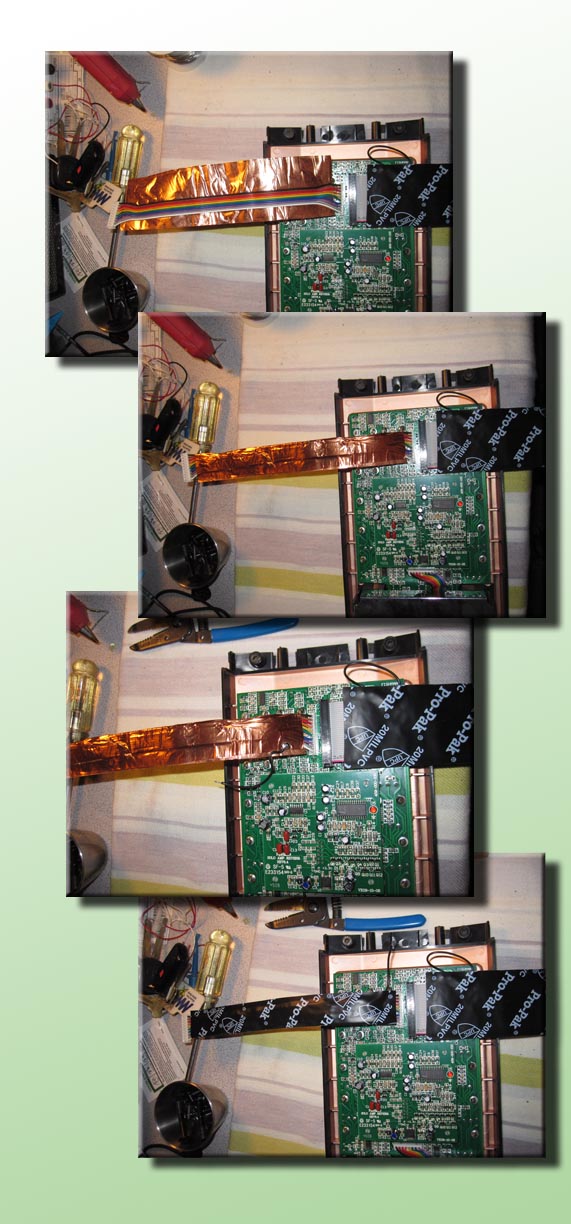
Attaching the Shields to Ground:
Go ahead and plug in the first cable in if you haven't done so already. You remembered the orientation right?. If not take a close look at the picture to make sure it's installed correctly.
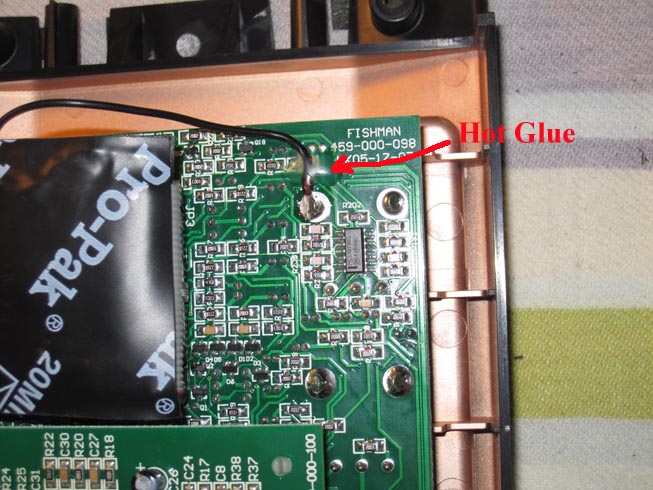
Now it's time to solder the loose end of the wires to ground. Near each connector you'll find some larger thru hole pins that are the ground connections for the cable jacks on the front panel. We'll use these as our ground points. Simply solder the wires to these locations being careful not to short anything. Finally, I added a drop of hot glue to each wire to hold it to the board and act as a strain relief. I only have a picture of the grey cable ground wire, but the other cable is done exactly the same way.
|
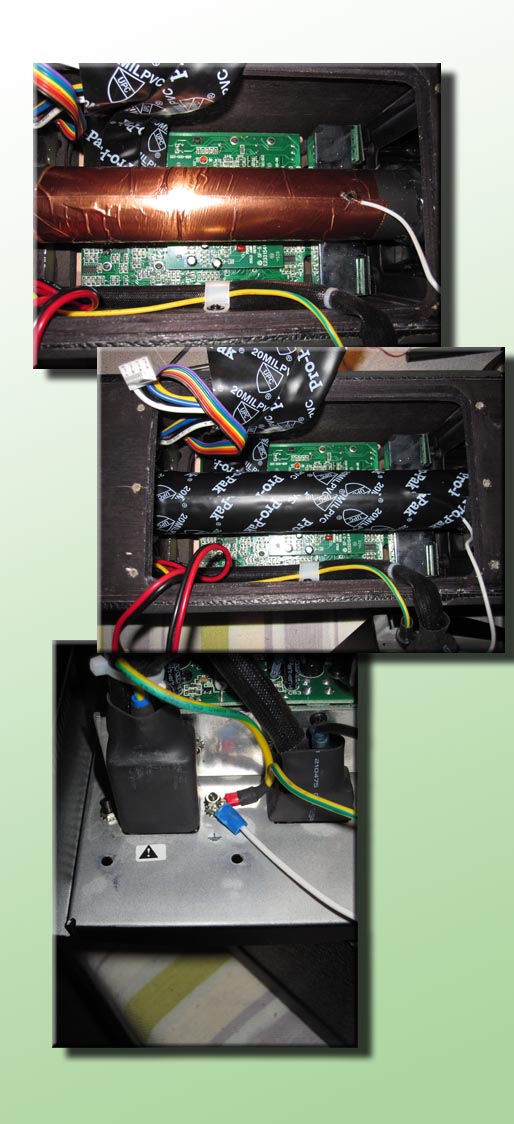 |
Shielding the Carbon Fiber Tube:
We're almost done. When I tested things at this point, I noticed there was still a fair amount of buzzing. After probing a bit, I found that if I touched the carbon fiber tube that the tripod slides into with my hand the buzzing got much worse. If I then also touched one of my fingers to the rear panel which is tied to neutral, the buzzing completely stopped. The carbon fiber tube being a conductor was coupling 60Hz into the amp and onto the input panel which is only an inch or so away. I found that shielding the carbon fiber tube on the inside eliminated the remainder of the buzzing noise.
Start by covering as much of the carbon fiber tube as possible with copper tape. It's not necessary to cover the entire diameter. I was able to use two pieces of tape which was enough to go about 80% the way around the tube. You do want to make sure the strips of tape over lap so we can connect all the copper to neutral with only one piece of wire.
Next solder an eight inch piece of wire to the copper tape making sure to get the solder on both pieces of tape. Then cover the copper with some insulating tape to make sure no shorting can occur when things are reassembled. Finally, crimp a small lug to the other end of the wire and attach this under the nut on the back panel holding the other lugs. These are tied to the AC neutral line.
|