 |
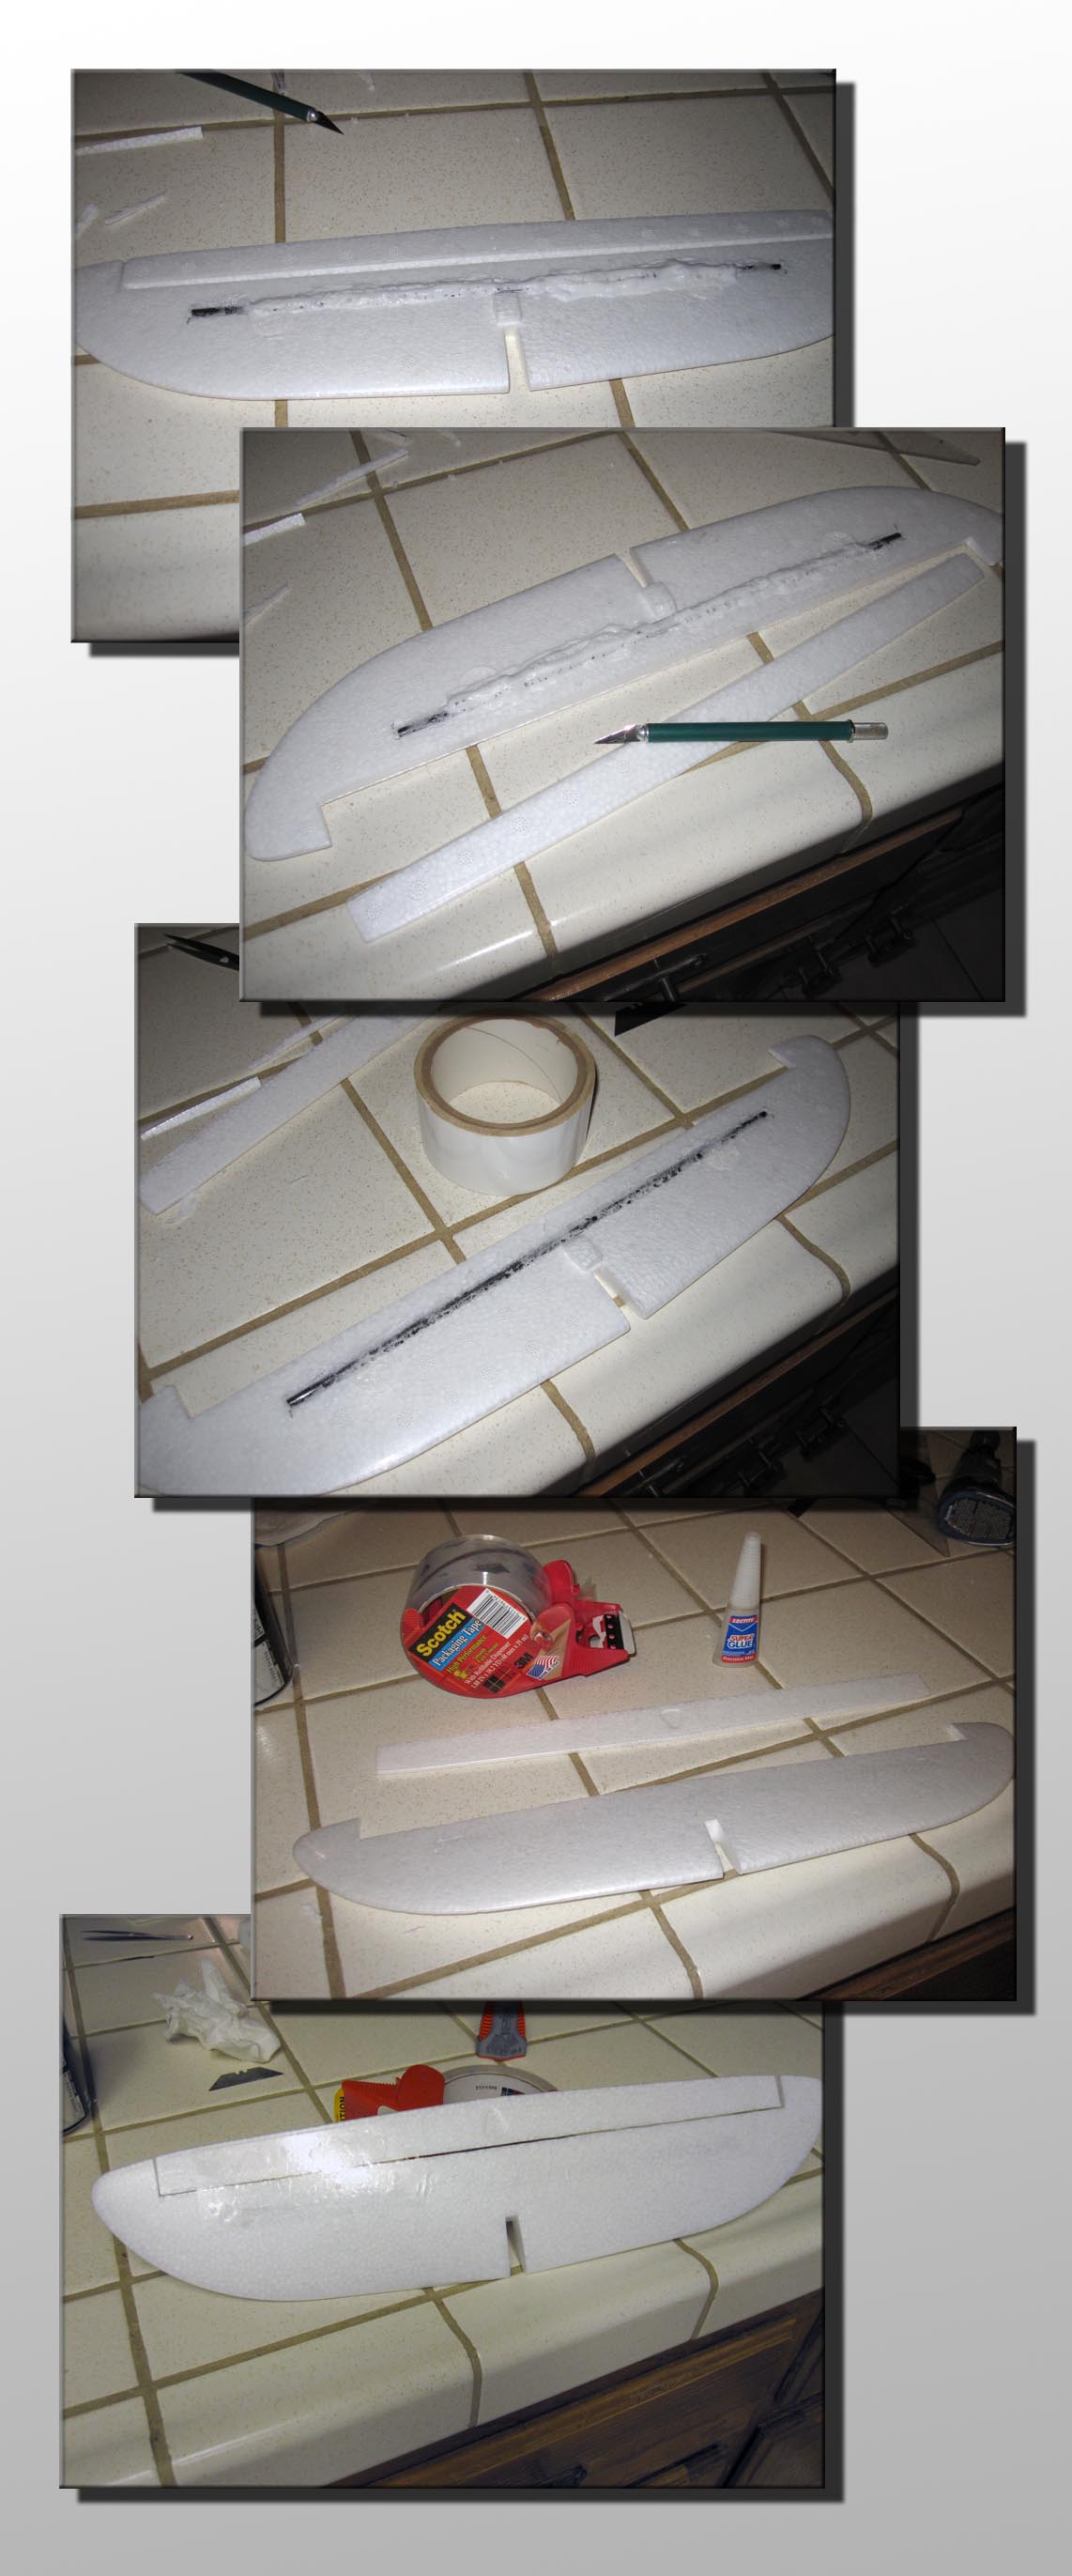
Finishing up the Tail:
Depending on how fast you've worked, the Gorilla glue used on the tail should be dry by now (allow at least 2 hours). You'll notice it foamed up quit a bit. No problem, it's easy to clean up. Before doing this though let's do some work on the elevator.
On the AXN Floater all the control surfaces are molded into the foam. Although this works, it can make them a little stiff and limit their motion. This was particularly true with the elevator. To fix this, I removed it with an x-acto knife then re attached it with some clear Scotch brand packing tape. Before re-attaching though, clean off the foamed up Gorilla glue by simply cutting along the surface of the tail plane with a sharp knife. Once the glue is trimmed down to the level of the tail plane you can apply a piece of white packing tape to make it look a little cleaner if you wish.
Now it's time to re-attach the elevator. To help the packing tape adhere to the foam I first applied a light film of super glue to the foam where the tape would be applied, then carefully placed the packing tape on the surface being careful to rub out all the bubbles and not glue myself to the foam at the same time. This results in a very strong and flexible joint. It's easier if you apply the tape to the elevator first and allow it to dry then attach this assembly to the tail plane.
|
|
Reinforcing the Body:
After flying my first AXN Floater to the point of disintegration, I identified a few areas on the body that if reinforced might make the floater last a little longer. Although impossible to make an airplane survive a really nasty crash, I was hopping to make it hold up a little better to the mild crashes and rough landings that can happen when flying in the desert like I do. Soft grassy fields can be a little hard to come by and my landing strip is often a narrow dirt road surrounded my rocks and creosote bushes. I also plan on packing the plane into remote areas for the purpose of aerial photography which means finding a clear flat landing area is not always in the cards.
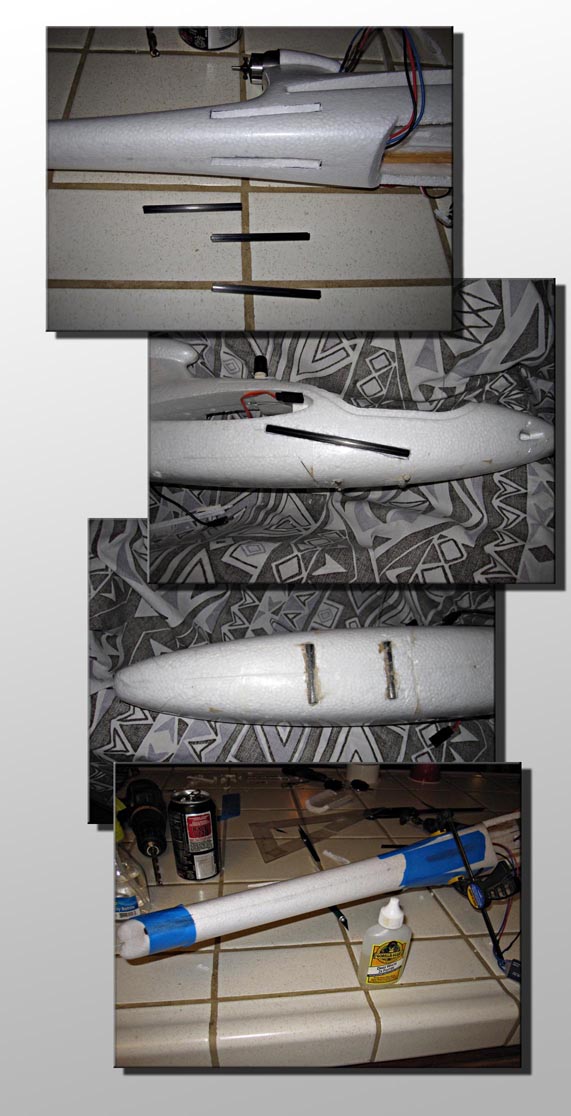
The first area to reinforce is the base of the tail boom. It turns out the floater is manufactured with a carbon fiber rod down the tail boom. This makes for a robust tail boom, but has the effect of transferring all the force of an impact to the point where the boom attaches to the body. By gluing three 3 inches pieces of the 1/4 inch carbon fiber rod into the body at this point I was hopping to spread the force out a little to improve the odds of surviving an impact. The same technique is used here as was used on the tail. Trace the outline of the rod onto the plane, cut out with an x-acto knife, clean the slot a bit with the Dremel tool to make sure the rod fits flush, apply a light mist of water to the slot, run a bead of Gorilla glue down the slot, insert the carbon rod and clamp.
The next area that could benefit from a little reinforcing is the nose. If you come in a little hot and steep, or simply slide into a rock or other object on the ground, the nose has a tendency to bend up. After doing this a few time the foam starts to get a little flimsy and deformed and pretty soon the canopy no longer fits. I decided to add two more pieces of the carbon fiber rod, one on each side of the plane. These pieces are each 4 1/2 inches long and are mounted diagonally right through the area I noticed the most deformation. Once again, trace, cut, clean, mist glue and clamp.
Finally, I decided to add some skids to the bottom of the plane in the hopes of making it hold up better to repeated landings on the 1 grit sand paper otherwise known as the desert. One 1 1/2 inch piece is installed at the end of the tail and two more are placed laterally across the bottom of the plane just in front of the hatch we cut into the body. The idea is to have the plane resting on the carbon rods when it is resting on the ground.
Allow the glue to dry for a couple hours then remove the clamps and clean up the glue that foamed up with a sharp knife.
|
 |
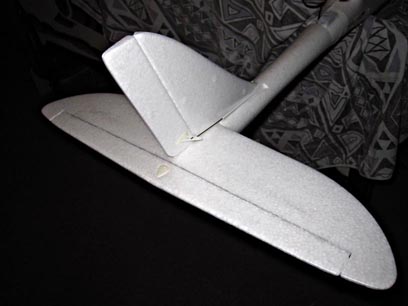 |
Installing the Tail plane to the Tail Boom:
Now that most of the work has been done to the body, we can attach the tail plane. This is done according to the instruction included with the AXN floater using the supplied glue. Take care to make sure it's straight while drying. Once dry, the supplied horns can also be attached and the control rods installed. We'll be making our trim adjustments from the servo side where the AXN Floater comes with some convenient adjustable push rod linkages.
|